
How to Screen Record on Your iPhone
Screen recording was introduced onto iPhone’s with the iOS 11 update back in 2017. So whether you want to capture your ABBA renditions on TikTok or you want to show off your PUBG skills, screen recording is the feature you are after but how do you actually do it? Here is a walkthrough of how to screen record on your iPhone.
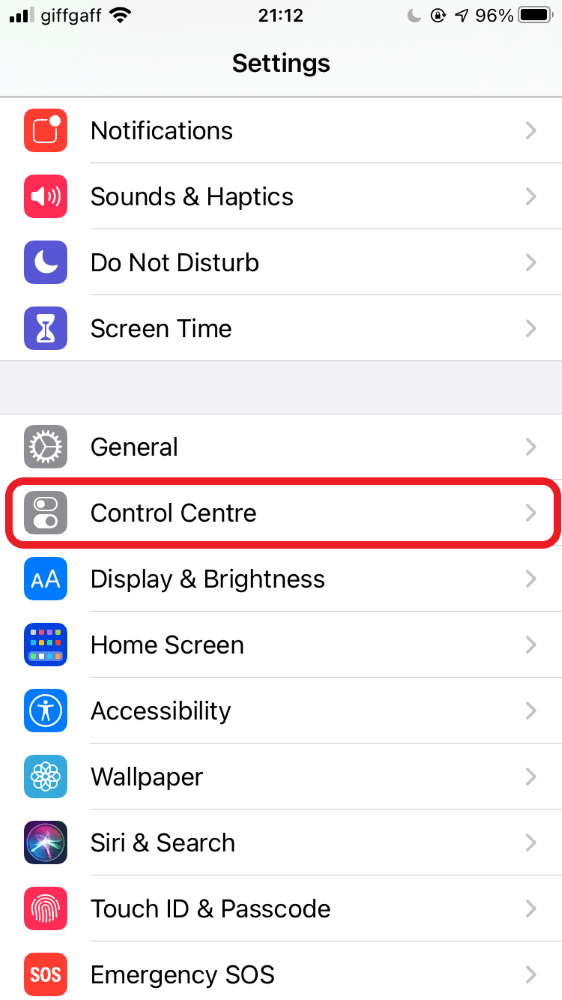
First, you need to check if the Screen Recording feature is enabled in the Control Centre. The Control Centre is the menu that appears when you swipe up from the bottom on iPhone 8 or older or down from the top right on an iPhone X or newer.
To do this do the following steps;
- Go to the Settings app and click on Control Centre.
- Make sure you set the Access Within Apps slider to On.
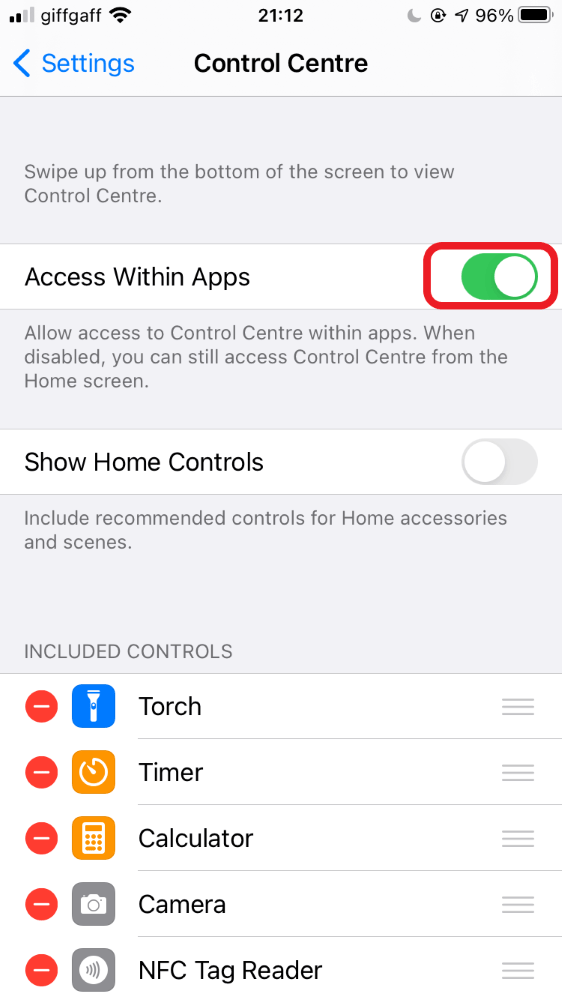
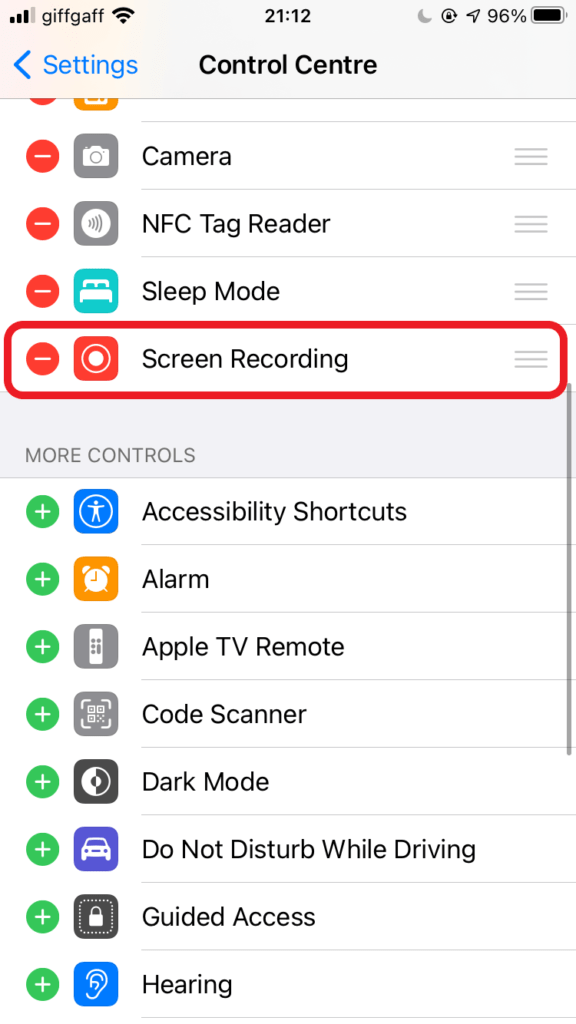
- Check if the Screen Recording feature is in the Include section at the top. If it isn’t in this list then you will need to add it.
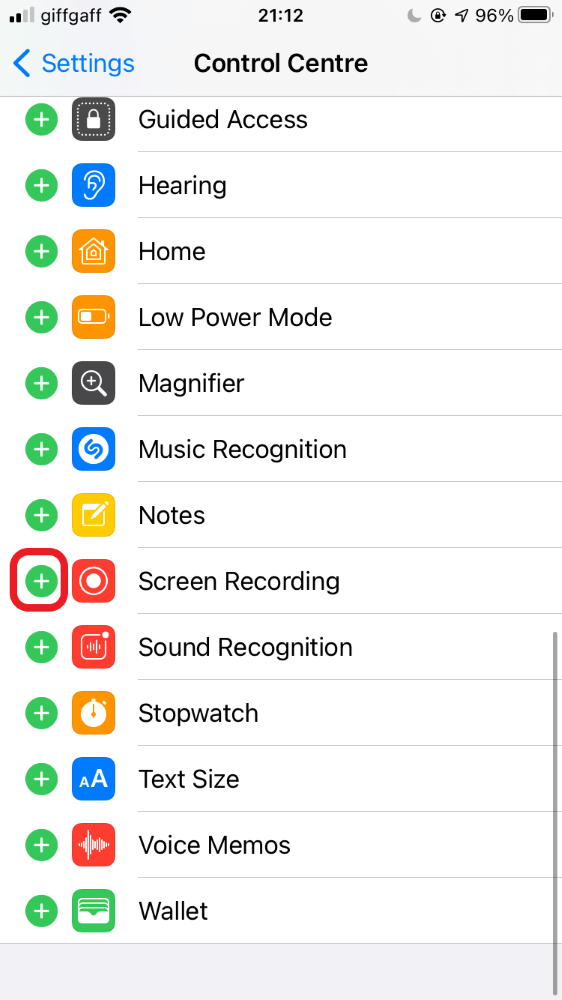
- Scroll down the list and find the Screen Recording control.
- Click the + button to the left of the control.
Screen Recording
Once you have done the above steps you are ready to start recording you dancing in your living room. Before you start any screen recording it is recommended to turn on your Do Not Disturb so your mum trying to phone you doesn’t ruin your masterpiece. So to start a recording do the following;
- Go into the app you want to record (e.g. Instagram, TikTok, Snapchat, Safari etc.).
- Access the Control Centre, swipe up from the bottom on iPhone 8 or older or down from the top right on an iPhone X or newer.
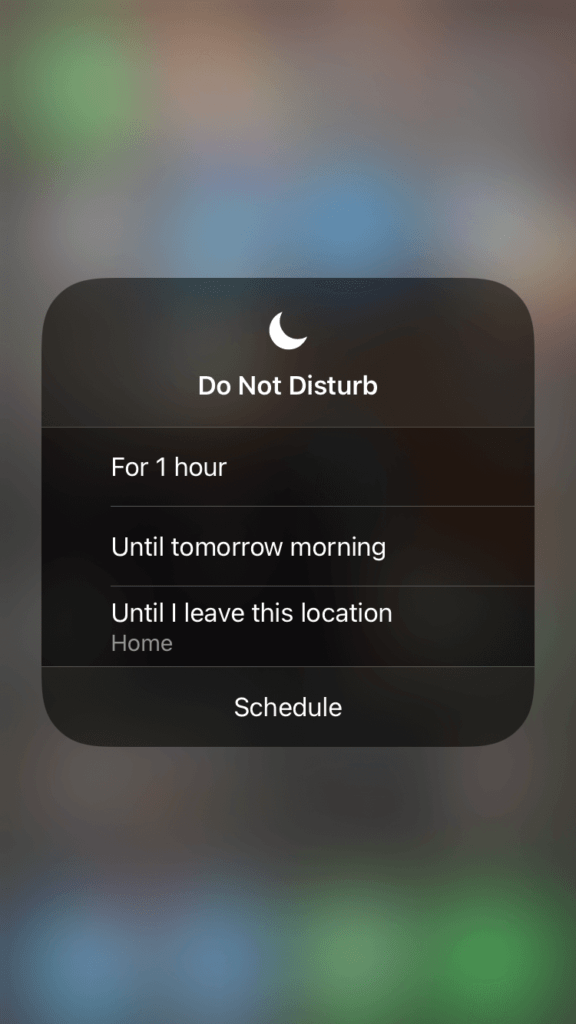
- Enable Do Not Disturb.
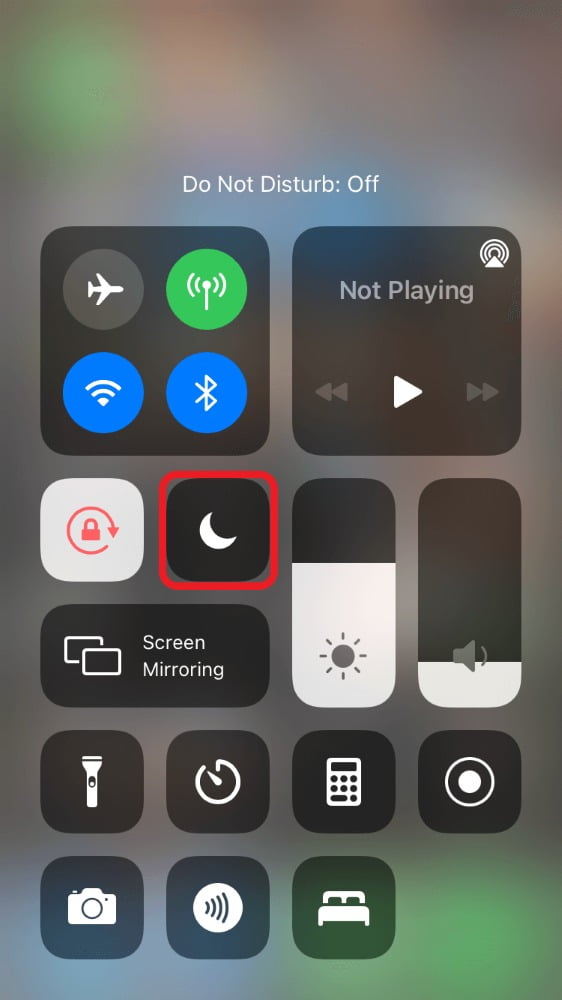
- Press and hold the Screen Recording icon.
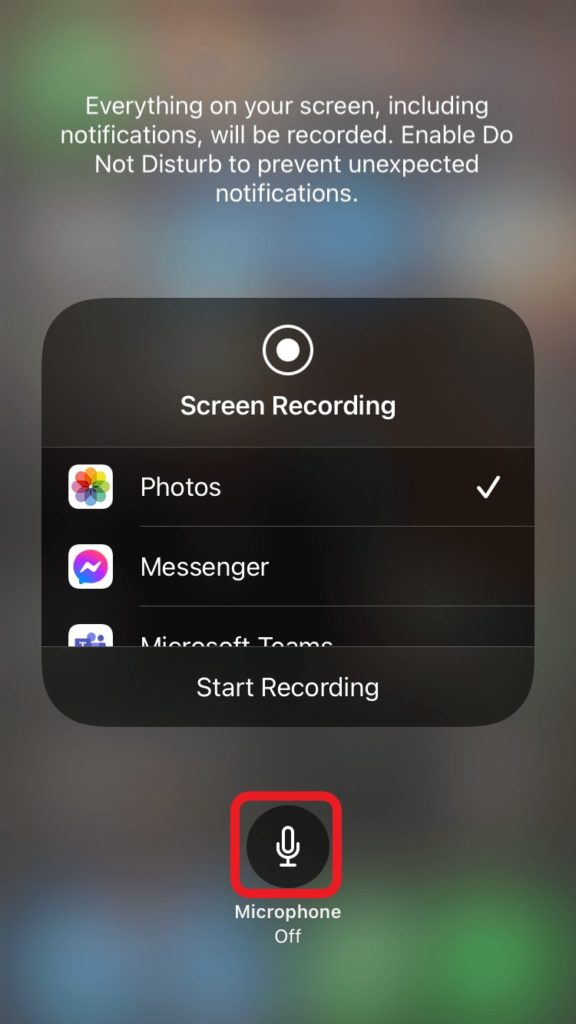
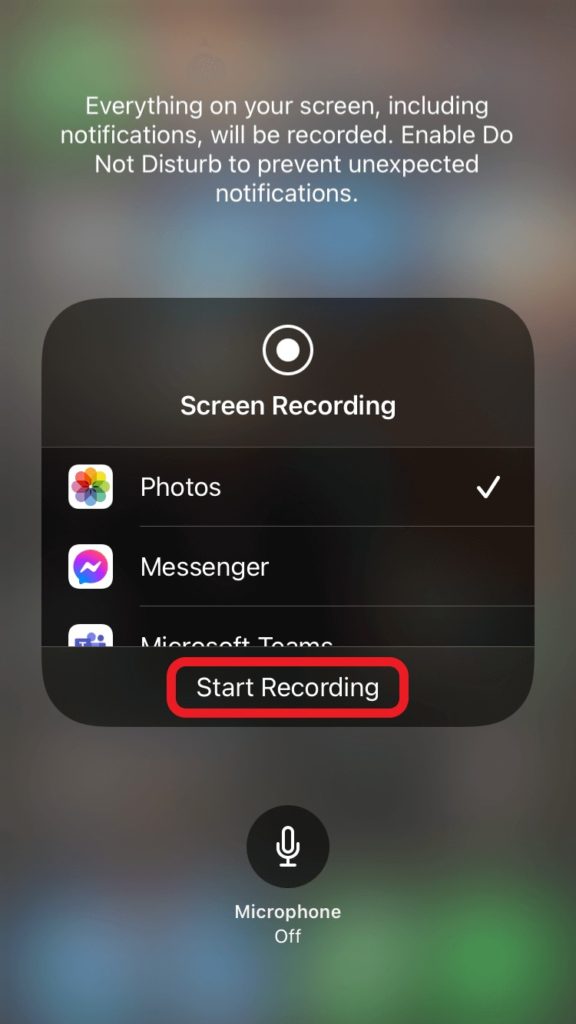
- If you want Audio to be recorded as well click the Microphone icon then click the Start Recording button just above the Microphone when you are ready to go.
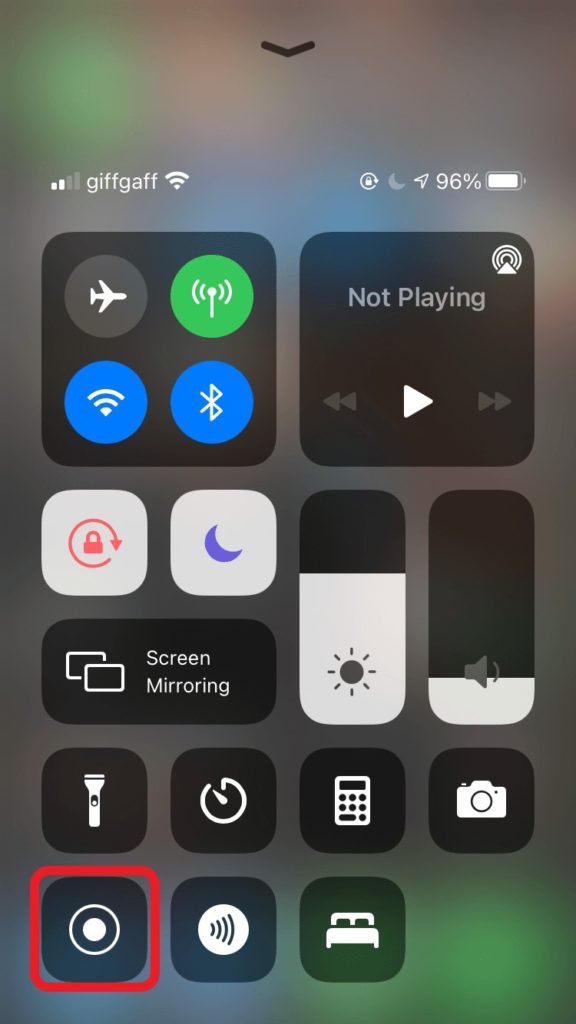
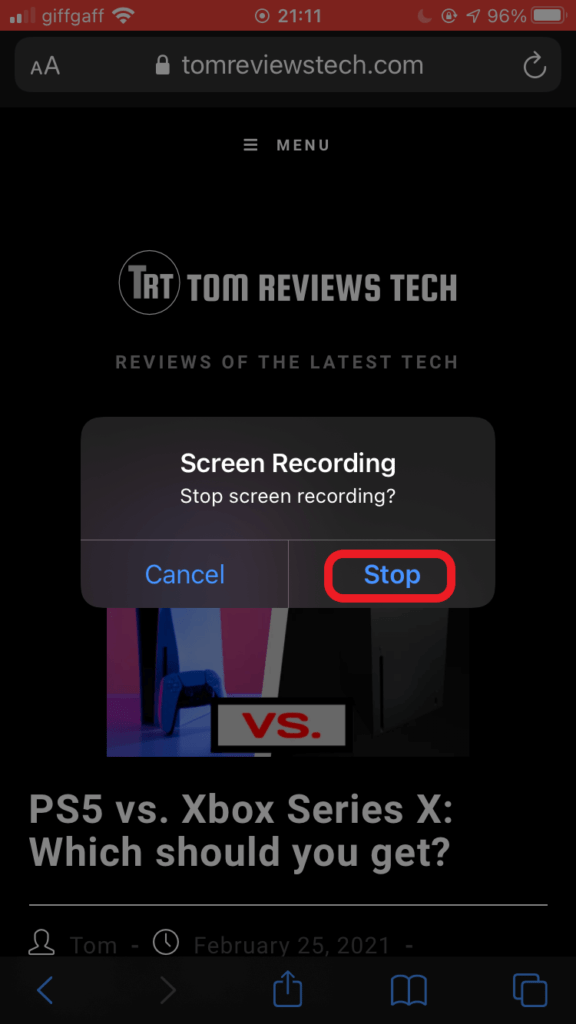
- Once you are ready to stop recording swipe to access the Control Centre again and click the Screen Recording button.
- A pop up will appear and you need to click the Stop button to stop your recording.

All screen recordings will be stored in the Photos app along with all your other media so you can use them to share on your favourite socials if you really want to grace the rest of the world with your creations.
Hope you found this quick tutorial useful.
Until next time ![]()
Thumbnail Photo by Dimitri Karastelev on Unsplash

